300 DPI photos and print layouts
Manage the photo's physical size, pixel size and printing paper together.
 Ai Foto Pro
MG Work Studio & Medya Ajans
Ai Foto Pro
MG Work Studio & Medya Ajans
AI FOTO PRO · PRODUCT GUIDE
Don't try to fit everything on a single piece of paper. Prepare files suitable for your studio's production style by determining the photo size, printing paper and layout spaces separately.
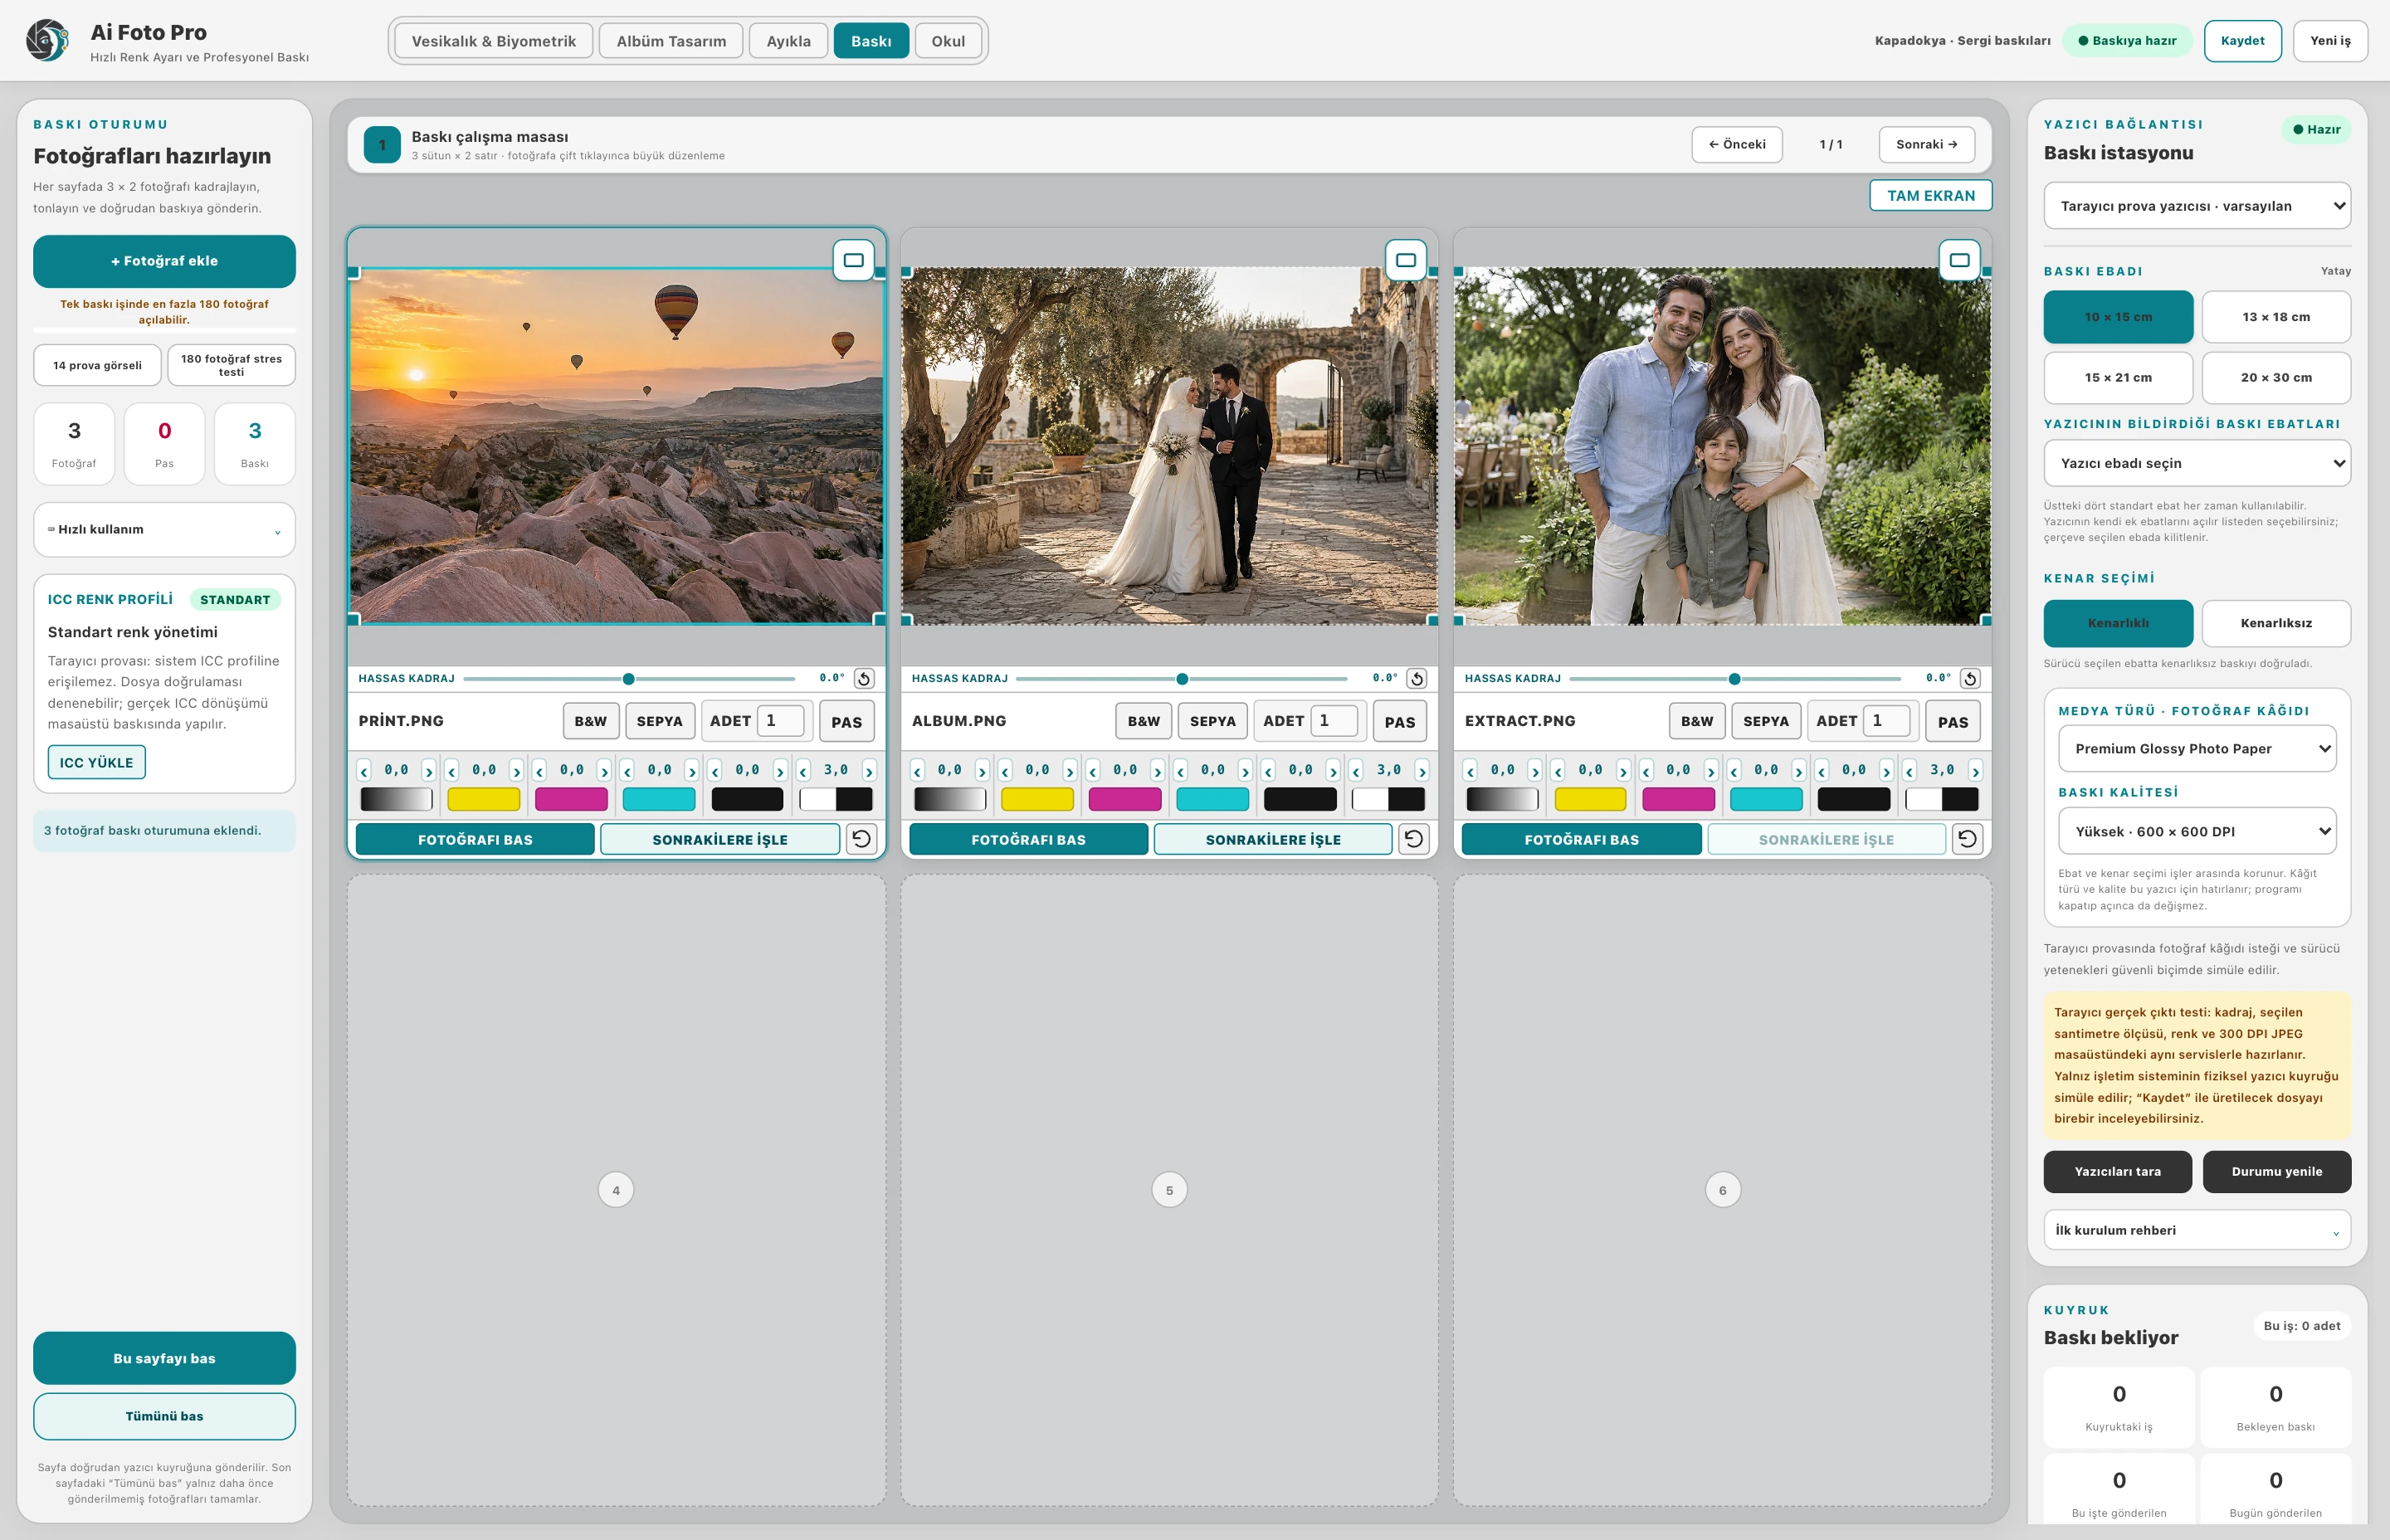
You can start with common papers such as 10 × 15, 13 × 18 and 15 × 21 cm, and enter width and height when special dimensions are required. Work in cm, inches or pixels in supported areas. Do not confuse the size of the photo type with the physical size of the paper.
Consider the thickness of the photo frame and equal spacing between photos on the print layout. Plan ahead for the areas you will need when cutting. When changing layout options, check that the actual size of each photo is preserved.
The paper size reported by the driver and support for borderless printing vary by model. The specific measurement on the screen does not mean that your printer physically accepts this paper. Check the paper, driver and output file together and start printing.
In custom measure supported workflows, you can define a target in units of pixels. Also check the DPI and physical size relationship for printing.
Evaluate the right workflow for your studio based on your own photos and output needs.